
Personal Project
Propagation Mist Clock
This was a project to design a Mist Clock control interface for a 4 Station propagation system. I designed the housing, interface, electrical circuit, and then delivered a functional prototype to a freelance client at a near 60% cost reduction from other available units on the market.
-
Photosensor elements
-
Individual station control
-
AC power supply, designed for 24/7 operation.
-
Interfaces with 4 24 VAC solonoids


Machined Clock
Overview
This school project required a variety of manufacturing methods from machining the 6061 Aluminum base on a manual 3-axis mill to turning the pencil holders on a manual lathe. I used a turret lathe to make the assembly nuts, a CNC mill to create the angled slot, and a CO2 laser cutter to cut the Acrylic sheet.

A Note To Future Students
An essential lesson from this project was the importance of keeping the final objective in mind and understanding how early decisions affect later stages of work. All machined components were finished to 800 grit, and several hours were lost attempting to remove deep surface damage caused by insufficient care during handling and storage prior to the finishing process. Consistently applying a small amount of effort throughout the project to protect parts from unnecessary blemishes can prevent significant time spent on tedious hand finishing later.

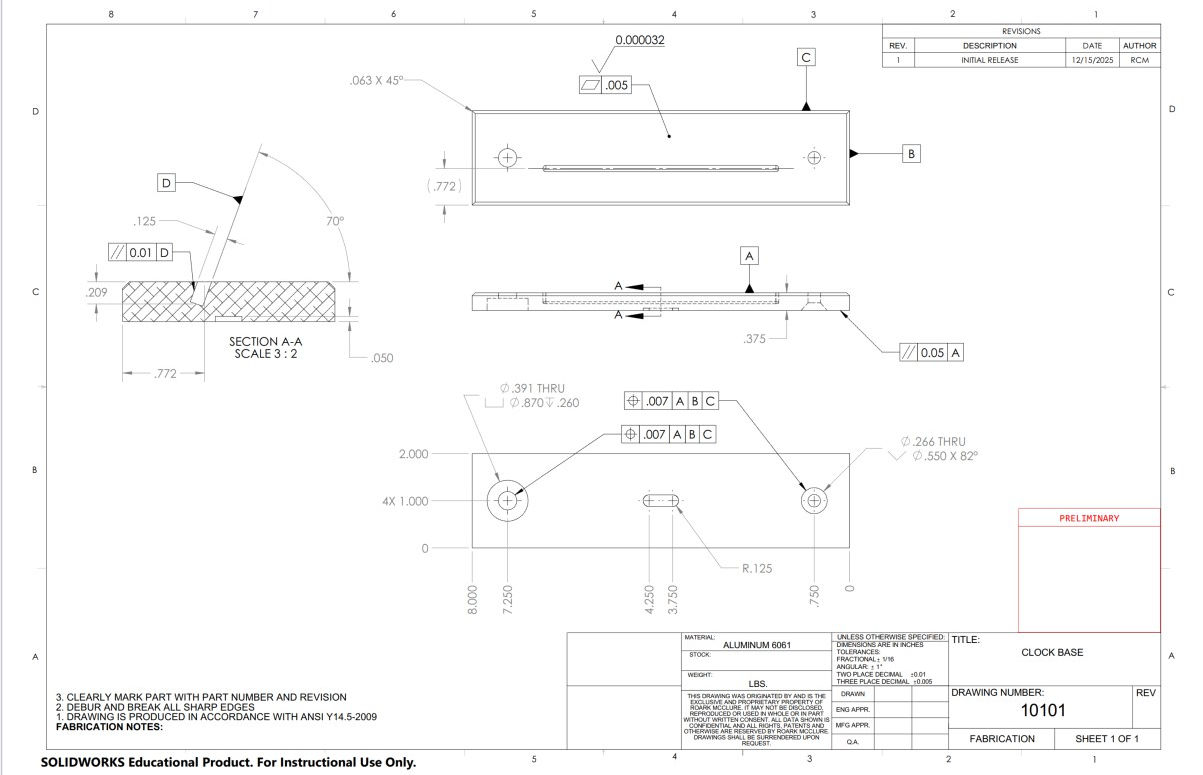
Clock Base Drawing - GD&T
In order for the base to perform it must be have certain features reliably within these control parameters.
- It must sit flat on the table
- The mounting holes must maintain their true position
- The sides of the slot must be parallel for the clock face to fit.
- The top surface must have an aesthetic finish equivalent to 600 grit.
Srewdriver
Overview
In this School project I forged, hardened, and annealed a flat head screw driver with an O1 Tool Steel shank and cast aluminum handle. We also formed the handle for a Phillips screw driver using injection molding.

A Note To Future Students
Key a take away from this project that I learned was to understand the feed calculations for setting knurling into the handle of the screwdriver. It is important to understand what the calculations mean relative to the process you are doing. Another lesson I applied from lessons learned in previous tasks was to sand the aluminum handle while still in the lathe before forging when the shaft will no longer fit in the spindle. This allowed for more efficient sanding using the motion of the lathe and required only minor touch-up after taking care to not gorge the finished surface during the rest of the process.
